Home Maintenance Tips

THIS WINTER MAINTENANCE CHECKLIST WILL KEEP YOUR HOME IN GOOD ORDER!

Inspecting your home on a regular basis and following good maintenance practices is the best way to protect your investment. Whether you take care of a few tasks at a time or several all at once, it’s important to get into the habit of completing these checks annually leading up to each season.

With winter well on its way, it’s important to establish a regular schedule to help prevent the most common – and also costly – problems from occurring. Be sure to make notes and take pictures of anything you’d like to share with an expert for advice or to help monitor the situation moving forward.

This checklist will help guide you in keeping your home a safe and healthy place to live this winter and year-round.

Of course, if you don’t feel comfortable performing some of the home maintenance tasks listed below, or you don’t have the equipment on hand to properly complete each section, you may want to call in a professional handy person.

Winter Checklist

  • Check and clean or replace furnace air filters each month during the heating season. Ventilation systems, such as heat recovery ventilator filters, should be checked every two months
  • After consulting your hot water tank owner’s manual, drain off a dishpan full of water from the clean-out valve at the bottom of your hot water tank to control sediment and maintain efficiency
  • Clean your humidifier two or three times during the winter season
  • Vacuum bathroom fan grills to ensure proper ventilation
  • Vacuum fire and smoke detectors, as dust or spiderwebs can prevent them from functioning
  • Vacuum radiator grills on the back of refrigerators and freezers, and empty and clean drip trays
  • Check gauges on all fire extinguishers, and recharge or replace as necessary
  • Check fire escape routes, door and window locks and hardware, and lighting around the home’s exterior. Ensure your family has good security habits
  • Check the basement floor drain to ensure the trap contains water. Refill with water if necessary
  • Monitor your home for excessive moisture levels – for instance, since condensation on your windows can cause significant damage over time and pose serious health problems, this requires corrective action
  • Check all faucets for signs of dripping and change washers as needed. Faucets requiring frequent replacement of washers may be in need of repair or replacement
  • If you have a plumbing fixture that’s not used frequently, such as a laundry tub or spare bathroom sink, tub or shower stall, briefly run some water to keep water in the trap
  • Clean drains in the dishwasher, sinks, bathtubs and shower stalls
  • Test plumbing shut-off valves to ensure they’re working and to prevent them from seizing
  • Examine windows and doors for ice accumulation or cold air leaks. If found, make a note for repair or replacement in the spring
  • Examine attic for frost accumulation. Check roof for ice dams or icicles. If there’s excessive frost or staining of the underside of the roof, or ice dams on the roof surface, be sure to have an expert look into the issue
  • Check electrical cords, plugs and outlets for all indoor and outdoor seasonal lights to ensure fire safety. If showing signs of wear, or if plugs/cords feel warm, replace immediately

12 Big Impact Renos to Prioritize When Making Over Your Home

by SHARON MIKI CHAN – HGTV

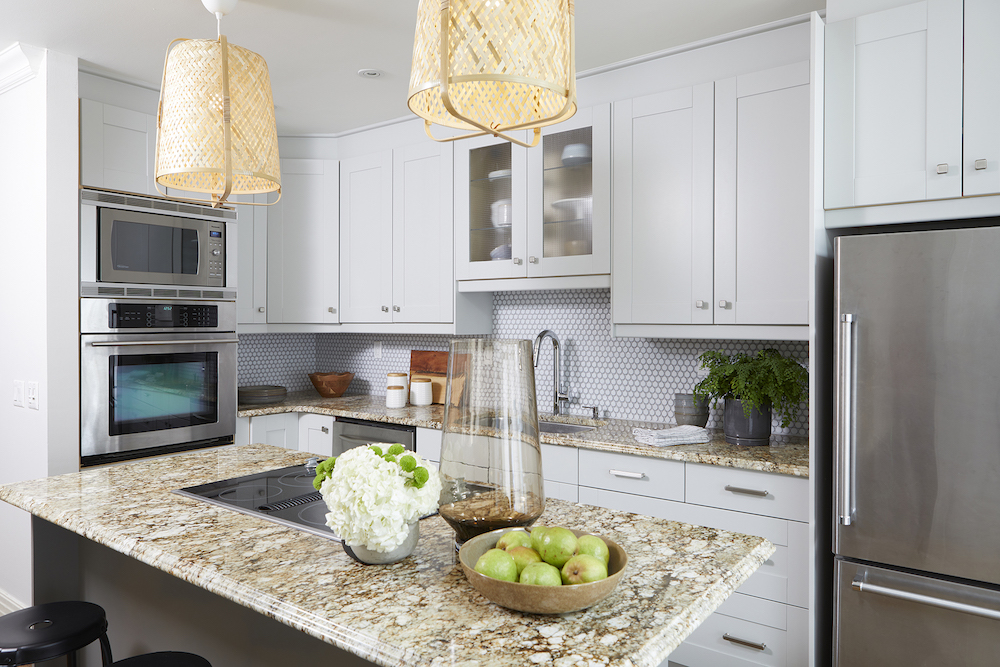
Change is a good thing, but — when it comes to home renovations — it can be challenging to know where to focus your efforts (and your reno budget). For a reno to have maximum impact, there’s a fine balance between projects that offer the highest possible return on investment with those that will help you fall that much more in love with living in your home. If you’re weighing your options when it comes to home updates, we’re keeping our money on these 12 big impact renos.kitchen with pale-grey painted cabinets and centre islandHGTV CANADA1 / 12

Refresh Your Kitchen Cabinets

If you’ve checked out any of the best home renovation websites, you already know that updating your kitchen is one of the most common (and biggest impact) ways to transform your home. But that doesn’t mean that you have to totally gut your cooking space to make it feel new. Updating your kitchen cabinets, as Samantha Pynn and Sebastian Clovis did with this Save My Reno refresh, is a lower-cost way to hugely refresh the space. Swapping out your cabinet hardware is an even simpler project that you can DIY. But you can also try refinishing your cabinets with paint for a more dramatic difference (tip: read Bryan Baeumler’s step-by-step guide first).

bright white kitchen with patterned tile backsplashTRACEY AYTON2 / 12

Build a Better-Than-Before Backsplash

Because it tends to take up a lot of visual real estate in the kitchen, your backsplash is another high-impact area that can give you a lot of bang for your buck with a home renovation. Especially when paired with neutral cabinetry, a backsplash is a great place to add style and personality – as this charming patterned tile backsplash shows in this Vancouver heritage home’s kitchen. Whether you want to try a DIY update or you want to have something more luxe installed, we’ve rounded up some seriously splashy ideas to spark inspiration.white modern farmhouse kitchen with large centre islandHGTV CANADA3 / 12

Try (Kitchen) Island Living

If you’re looking to invest a bit more in a home renovation, an entirely new kitchen is a smart home renovation for the best return on investment. A quality kitchen reno can bring as much as a 75-to-100 per cent return on investment. If you’re creating a new kitchen, adding a functional kitchen island (as Jonathan and Drew Scott did with this Property Brothers: Forever Home kitchen) is a great example of a good investment that can also bring more style and livability to your home.

cozy cottage with wood details and pale-blue wallsHGTV CANADA4 / 12

Go for a Fresh Coat

Painting your home’s interior is the ultimate triple threat when it comes to home renovations: It’s cost-effective, it can dramatically change the look of a room, and it delivers one of the best returns on investment. As Scott McGillivray and Debra Salmoni beautifully showed with the soft blue walls for this Scott’s Vacation House Rules reno, a fresh coat can make a major difference.

blue-and-white bathroom with tiled shower and double vanityHGTV CANADA5 / 12

Expand Your Bathroom

There’s a reason why people say “kitchens and bathrooms sell houses.” These functional rooms can make your home feel outdated in a hurry, while updated kitchens and bathrooms can make a house look luxe (which means major ROI). With that in mind, expanding your bathroom – as the Save My Reno team did here by taking closet space to make room for a double vanity and glass shower – is a home renovation win-win.

modern bathroom with mixed-pattern tiles and heated cement floorsLAUREN KOLYN6 / 12

Heat the Bathroom Floors

Updating your bathroom flooring is a great way to make a big-impact style statement, and it’s also an opportunity to add spa-like comfort and energy-efficient value with heated floors. Check out the heated concrete floors in this eco-conscious Montreal home’s bathroom. Because bathrooms tend to be smaller spaces, installing underfloor heating is a relatively cost-effective home renovation (particularly if you’re already tearing up and replacing old tile). It’s a little luxury that will bring a lot of comfort on chilly mornings.

spacious living room and entryway with new flooringHGTV CANADA7 / 12

Fix Up Your Flooring

If your flooring is damaged or severely out of date, installing new floors can become a bit of an investment. However, it’s likely a wise one, with new flooring offering a potential return on investment of between 100 and 150 per cent. Case in point? The beautiful new floors Dave and Kortney Wilson used in this Family Home Overhaul living room. Not sure which type of flooring to choose for your home renovation budget? We break down the common renovation costs of different flooring options for you here.modern boho bedroom with patterned wall and wall-mounted light sconcesLAUREN KOLYN8 / 12

Wall-Mount Your Bedroom Lights

There’s not much you can do to increase the square footage in a compact bedroom (unless you’re ready to tear down some walls). But there are a few tricks you can use to make a small bedroom look bigger: E.g. Swapping your bedside lamps for wall-mounted sconces. You can opt for corded plug-in models (as seen here with this modern-boho bedroom), or have an electrician install sconces.

contemporary backyard space with modern fencing all aroundHGTV CANADA9 / 12

Prioritize Privacy Outside

Home renovations don’t need to be limited to what’s inside your walls. Updating outdoor spaces can make a huge difference in the overall livability of your home (especially during sunny seasons). Even if you love your neighbours, adding a stylish and privacy-enhancing fence (like the modern engineered fencing that Brian McCourt and Sarah Keenleyside used for this Backyard Builds space) is a smart investment. With more privacy, you’re more likely to enjoy your outdoor oasis. Here are more ways to add privacy to your patio, backyard or other outdoor space.

spacious kitchen with vaulted ceiling and new custom windowsHGTV CANADA10 / 12

Replace Old Windows

When it comes to home renovations, replacing old windows might not sound super high-impact, but it’s actually a project that delivers huge visual transformation and plenty of livability benefits. From windows that are drafty or damaged to low-insulation single-pane windows, older windows can slowly cost you a lot with your energy bills. If you replace your home’s windows with more energy efficient models (like the Scott’s Vacation House Rules team did here), you’ll get more than just a clear view and fresh look – you can also save money on energy costs, reduce your carbon footprint and get better sound insulation.finished basement with green kitchenette areaHGTV CANADA11 / 12

Finish the Basement

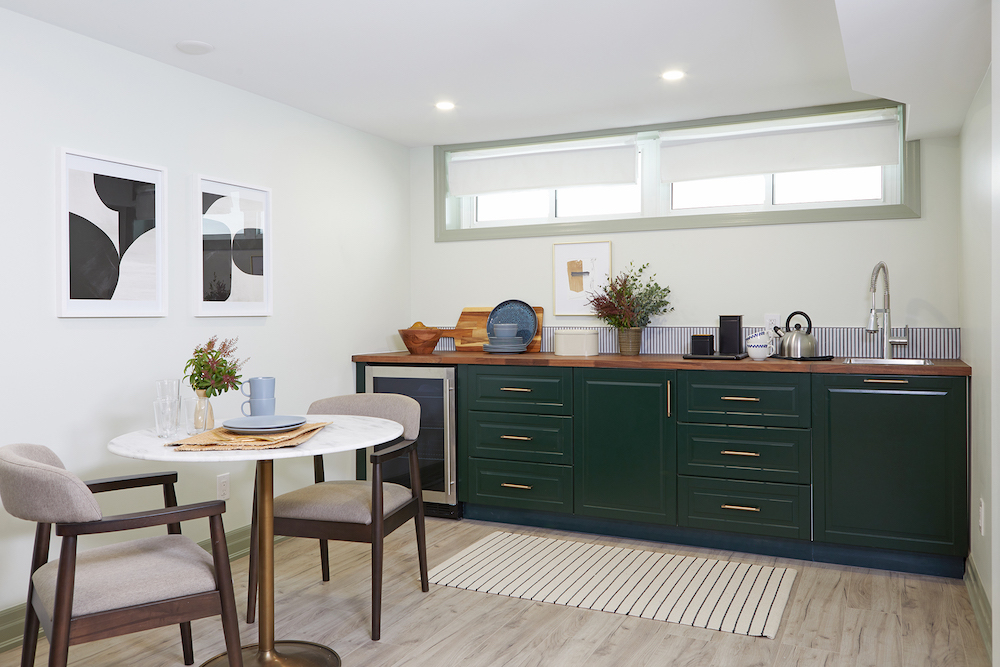
If you own an unfinished basement, you’re basically letting livable space collect dust. While a basement renovation is typically a larger expenditure of time and budget (especially if you have to lower the basement), it can also be a great investment by giving you more useable square footage for anything from a rec room, to a home gym or even a guest suite for friends and family (like the Save My Reno basement shown here).

colourful craft room with colorblocked walls and craft supplies in containersHGTV CANADA12 / 12

Create a Dedicated Space

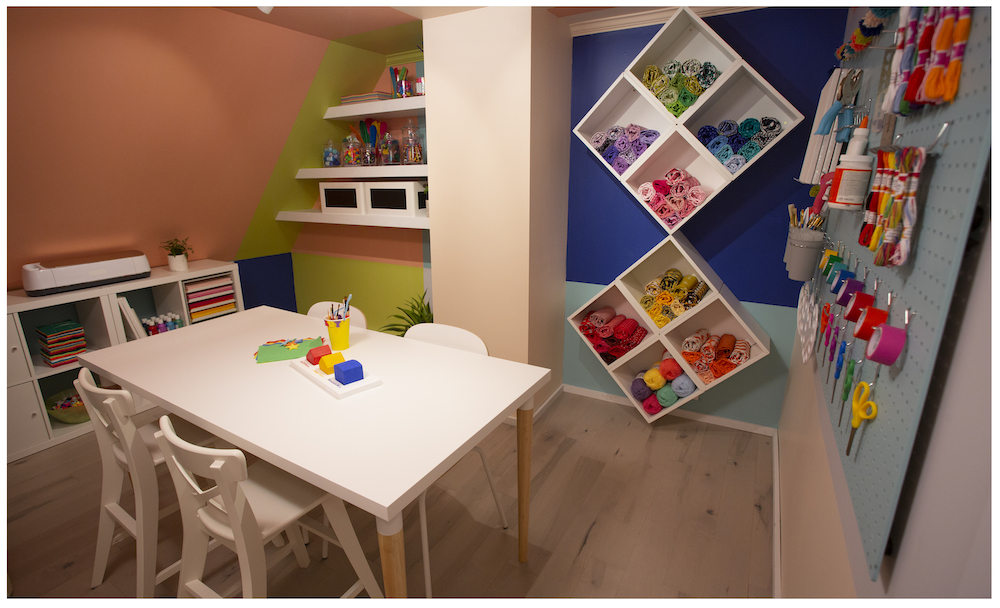
After spending more time at home recently, many of us have learned the value of making the underused areas in our homes into functional (or multi-functional) spaces that let us do what we love. Whether it’s turning a nook under the stairs into a home office, organizing the garage to do double-time as a gym or turning a spare room into a colourful craft room (as Rock Solid Builds‘ Randy Spracklin did for his family here), a customized reno that makes it more comfortable or convenient to follow your passion can totally transform your home.

6 Common Causes of Clutter and Their Cures

If you have clutter in your home, you’re certainly not alone. Most of us hang on to unneeded things and struggle to keep our homes clutter-free. But if we could identify the root causes of the clutter, could we make it go away?

Identifying the cause of clutter is definitely a great first step. Clutter may have one of several root causes. Read on to discover six of these causes as well as how to address them.

1. Your Life Circumstances Have Changed

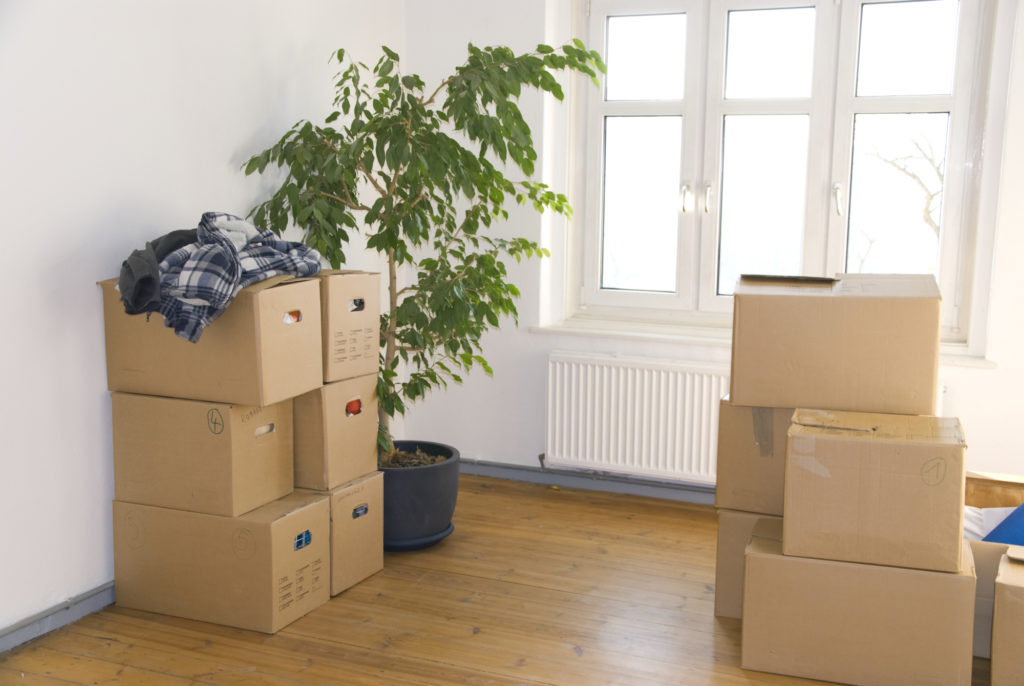
A change in life circumstances — a new baby or job, a move to a new home, an illness or injury — can be stressful and lead to a typicallytidy home becoming cluttered. Eventually, this type of clutter resolves when the baby starts sleeping through the night or the moving boxes are unpacked.The question is how long adjusting will take and how much your clutter will bother you in the interim.

If you’re frustrated by your chaos and you lack time or bandwidth to address it, you may want to seek help from family, friends or a professional home organizer to get you through this stressful phase.

2. You Lack Habits for Keeping Your Home Tidy

Some people are not in the practice of hanging up their jackets or putting away their beauty supplies. Patterns like these can cause a state of disarray at home. But it’s not impossible to establish new habits. We recommend trying an approach called “the habit loop,” from the bestselling book The Power of Habit: Why We Do What We Do in Life and Business, by Charles Duhigg. Essentially, it involves three steps: cue, routine and reward. The cue is a reminder that initiates a new behavior. The routine is the behavior itself. The reward is the benefit you get from doing the new behavior.

3. You Lack Systems for Handling Your Stuff

Not having systems in place to handle items we touch every day can lead to a lot of clutter buildup. Here are a few of the big culprits.

  • Paper and mail are the No. 1 source of clutter in many homes. If you’re unsure how long to keep old bank statements, bills, tax returns and other records, or if you lack an efficient system for handling pending paperwork such as unpaid bills, the mess tends to mount. The good news is that you can take some simple, straightforward steps to address your paper pile and create a system for sorting mail.
  • Cellphones, keys, glasses, wallets and laptops. Lacking a designated location to store these items can lead not only to clutter but to endless frustration. The solution is to simply designate a location so that you don’t have to search for these items every time you leave the house. A kitchen drawer with a charging station is ideal, but if you don’t have one, then simply corral these items in a small basket near an electrical outlet where you can easily grab them when you leave the house.
  • Purses, computer bags, backpacks, sports bags and outerwear. Closets and coat racks can fill up quickly with these bulky items, with extras ending up on the backs of chairs or draped over bannisters. Often, there are just too many of these items, so consider winnowing your collection. For example, if your child receives a new backpack each year, consider donating the old one. Sort through coats and donate any that no longer fit or you no longer use. Hang everyday bags and outerwear on a coat rack or in a closet near the front door. Store ski jackets and special-occasion purses in a different location.
  • Children’s art supplies, toys and homework. Children generate a large amount of clutter, with the most intense period of disarray beginning in babyhood and continuing through elementary school. Taming this mess can be challenging for even the most organized person — especially when it comes to toys that pile up as friends and family members offer gifts. If your child will agree, consider donating some toys to a charity to cut down on the mess.

As for the rest of children’s belongings, because young children like to be near their parents, you’d be wise to set up storage in or near the spaces where the family is most likely to spend time. Typically, this is the kitchen or great room.

4. You Own Too Many Items Used for the Same Purpose

You may have collected an overabundance of pens, pencils, reusable grocery bags, notepads, serving bowls and platters, kitchen tools, sunscreen, binders and coffee mugs. Fortunately, this is a relatively straightforward decluttering challenge. Simply reduce your collection of these items to an amount that will reasonably fit into your storage space and that you will realistically be able to use. Going forward, consider what you already own before buying. Be realistic about whether you have room to store a new item.

5. You Avoid Making Decisions About Your Things

Some people avoid deciding what to do with their clutter by placing items in a basement, garage or closet not visible from the main living spaces. This is a common tactic when quickly cleaning up before a party. However, this type of clutter weighs on people’s minds because they know it has to be dealt with sometime. Our suggestion is to sort through boxes and bags of stashed belongings that have been left in place for years. Usually the contents end up in the recycling bin or the landfill. If you know you have such boxes lurking, consider enlisting the help of a friend or a professional to help you sort through them.

6. Your Health Gets in the Way

A long-term health problem can sometimes result in household clutter as schedules are upset by medical appointments and free time becomes scarce. In these circumstances, a person may lack energy or mobility. Similarly, clutter can accumulate as we age and lose energy, balance or mental capacity for making decisions.

In such cases, it may be necessary to get outside help. A family member might need to attend to the clutter once a week. A professional organizer may need to create systems to more easily keep the home tidy.

On the other hand, extreme clutter or hoarding is usually caused by underlying issues that may require the help of a psychologist or other professional.

For most of us, clutter is simply a part of modern life. If you struggle with it, you’re certainly not alone. But take heart: With determination and a little help — whether moral support from friends or the guidance of a professional — you can overcome it and live a more organized life.

https://www.facebook.com/CalgaryVirtualOpenHouse

How To Care For Engineered Wood Flooring

Strong, durable and often less expensive than solid wood, engineered wood flooring has been a staple in our homes for quite a while. To help you keep yours in tip-top condition, three experts share their advice on installation, protection, cleaning and repair.

Choose Your Boards Carefully

When you’re purchasing your flooring it’s important to consider four main areas: construction, species, coating and finish.

For the subfloor, it is recommended that a high-quality plywood with a natural, formaldehyde-free glue.

If you’re going for an oak species, experts suggest going with a slower-growing one because it “has a tighter grain and produces a more stable wood structure.”

It is also advised to choose a wood with a UV-resistant, fire-retardant, hard-wearing coating to ensure a longer and safer life expectancy. You may also want to look into applying an oil finish with a high wax content.

Hardwoods, such as American white ash and oak, are among the densest, hardest-wearing timbers and will not dent or mark easily. Whereas, softwoods such as Douglas fir and pine are not as durable and should be handled with care.

Get the Basics Right

If you’re laying new engineered wood flooring, there are things you can do to ensure your boards stand the test of time. It is imperative to prepare the subfloor first. Check the subfloor to ensure it’s clean and free of any dirt, paint, grease or glue residue that may affect adhesion. You will need to ensure that the floor is completely level.
Because you will need to ensure that your subfloor is perfectly dry, us a moisture meter to test it accurately. When protecting your newly laid floor during the remainder of the construction process, never use plastic to cover it, as this will trap moisture, which could affect the floor. Instead, use a good-quality felt covering can be laid and taped to the [baseboards] to allow the floor to breathe. Alternatively, you could also use  builder’s lining paper and then hardboard as these protect the floors while allowing them to breathe.

And what if you have some boards left over? Don’t throw them away. Keep a few spare planks in case of any future damage.

Add Some Protection

Prevention is the best way to protect engineered wood flooring. Stick felt pads under all your furniture and remember to lift rather than drag heavy items.


Keep in mind the importance of room temperature, both during installation and long-term. Generally, the temperature shouldn’t vary drastically. Ideally temperature should be between 64 and 68 degrees Fahrenheit. If you have under-floor heating, don’t turn the heating off, just keep it on low.

Sudden changes in temperature will shock the wood flooring and could cause lifting, or the top layer of engineered boards to delaminate. And bear in mind, carpets on wooden floors can add considerable heat to the temperature between floor and carpet.

Keep Them Clean

When asked how you should clean your engineered wood flooring,  It is suggested to vacuum, sweep or dust frequently to collect dirt. Make sure you use a soft-bristle head if vacuuming to avoid accidentally scratching the floor.

As for mopping, the key is to use a damp cloth with a little wood floor cleaner, rather than a mop soaked in water. Wood is hygroscopic, so it acts like a sponge and will expand when it gains moisture and shrink when it dries out. This can cause splitting or cracks, so never drench your wood floor when mopping or use a steam cleaner.

The level of maintenance will depend on the level of traffic. Daily cleaning of the floor with a soft mop or vacuum cleaner will remove a lot of dust and/or sand particles. It is recommended that you apply hard wax oil after six to nine months.

It’s a good idea to consult your supplier to make sure you’re using the correct brand of aftercare products. Floor cleaners are specific to the floors, so don’t just go to a supermarket and buy a wood floor cleaner, as it may do more harm than good.

Fill Those Cracks

Small cracks or scratches can easily be filled or remedied using a wood-colored wax stick in an appropriate shade. Repair kits containing several shades of wax sticks, which can be used alone or mixed to create the color required, are available from DIY suppliers.

It is recommended to have an expert do this for you as they will finish with a pigmented oil to revive the color. Or in a worst-case scenario, it’s possible for an experienced installer to remove an individual plank and replace it with a new one.

https://www.facebook.com/CalgaryVirtualOpenHouse

How to “hail-proof” your roof before Calgary’s next big storm

Calgarians have had more than their share of weather challenges this summer, including several nasty bouts of hail. Thankfully, a little preparation can help your home’s roof emerge unscathed the next time golf-ball-sized ice chunks starts falling from the sky.

“Hail eats standard laminate architectural shingles like sugar eats kids’ teeth,” said Anthony Babin, owner of A.B’s Roofing & Contracting. “The best protection is found in metal, rubber and tile roofs, followed by those with Class 3 or Class 4 high-impact-resistant shingles.”

Of course, protection comes at a cost. While standard shingles will run a homeowner around $2.30 – $3.50 per square foot, depending on the contractor, impact-resistant shingles range from $3.50 – $5.00 per square foot. Rubber, metal and tile come in at $5.00 – $8.00 per square foot.

Fortunately, most roofs are built to last, so that upfront cost can be a solid investment.

“The average lifespan for standard architectural shingles is 15 – 25 years, and the majority come with a limited lifetime warranty,” said Babin. “While warranties for other material like rubber, metal and tile differ among manufacturers, they generally range from 25 – 50 years.”

“HAIL EATS STANDARD LAMINATE ARCHITECTURAL SHINGLES LIKE SUGAR EATS KIDS’ TEETH.” – ANTHONY BABIN, A.B’S ROOFING & CONTRACTING

The choice of material will also impact ease of installation. All asphalt shingles are fairly easy to install, as is rubber, while metal can be more technical.

“With asphalt, you put underlay on and install the shingles right over top, but metal requires a different underlay and strapping on the roof deck,” said Babin “This allows you to elevate the roof and still have the ability for air to transfer through the space, avoiding issues with mould or condensation. Tile roofs can equal metal in terms of complexity, depending on the design.”

Apart from choosing the right roofing material, the key to proper protection during the next hailstorm comes down to general maintenance.

“So many homes are way past due for maintenance, so the biggest thing I stress is being proactive with your property,” said Babin. “We see the most problems with older homes, and often with rental properties where the owner may be trying to squeeze every dollar they can from the property without doing maintenance.”

Homeowners are encouraged to regularly inspect their property and have a roofer or contractor with verified credentials examine their roof if they believe there might be an issue.

“Spring is a good time to look at your roof, as it has just gone through the freeze/thaw cycle that can cause a lot of damage to shingles.”

As with any house-related project, owners should do their homework before hiring a professional.

“Check references on a contractor and ask to see their portfolio, then check that they have general liability insurance and WCB coverage,” said Babin. “At the end of the day, this will ensure that the work is done properly and at a reasonable price.”

Credit:Geoff Geddes

Use Your Water Meter To Check for Leaks As Part Of Your Home Maintenance

  1. Turn off all taps and water using appliances in your home
  2. Check the water indicator- this could be a gear, triangle or needle on the face of the meter. If it keeps turning you have a leak in your house.
  3. Check your toilet, taps, humidifier, hot water heater, water softener and other water using devices for leaks.
  4. Visit calgary.ca/waterguide to learn more about addressing leaks.

Save water and avoid high bills by fixing water leaks.

City Of Calgary’s Fall Checklist

City Of Calgary’s Fall checklist (taken from City of Calgary’s website)for more information head to Calgary.ca/waterguide

Lawn and yard

  • See our watering 101 guides to find out when to stop watering plants, shrubs and trees – Mature Landscaping or New Landscaping.
  • Consult our YardSmart plant lists to make any seasonal additions to your garden like bulbs.
  • Clean debris and dead annuals from plant beds, and cut back perennials.
  • Place mulch around perennials and trees to protect them from frost.
  • Prune your trees and shrubs.
  • Let your grass grow into dormancy – stop watering and stop cutting.
  • Turn off the outdoor water supply to avoid winter leaks.
  • Properly winterize and turn off your irrigation system to avoid leaks.
  • Clean debris out of your gutters.
  • Clean and repair downspouts, and direct stormwater away from your house, ideally towards your garden.
  • Clean and properly winterize your rain barrel.

Inside your home

  • Still have an old, high-flow toilet? Consider replacing it with a low-flow WaterSense approved model to save money and water.
  • Check your sump pump for leaks or damage.
  • Clean out the backflow valve located in your basement.
  • Use your water meter ​to check for leaks inside your home every six months as part of regular home maintenance.
  • Check your toilets, taps, humidifier, hot water heater, water softener and other water using devices for leaks.
  • Service your hot water heater, water softener and humidifier.
  • Check your home insurance policy before deciding to turn your water off, and confirm how often someone needs to check on your home while you’re away.

Blue Recycle Bins Getting Checked In On


Blue Recycle Bins Getting Checked In On

Depending on which area of the City of Calgary you are residing in, you may have already noticed that the City Of Calgary is sending a team out to evaluate your Recycle Bins. They are trying to ensure that Calgarians are properly recycling and giving out notices if your bin is incorrectly loaded with recyclables. Please visit the calgary.ca/bluecart website to ensure you don’t get a notice.


Calgary – Lets Recycle Correctly Together

Credit for article – Calgary.ca/recycling –

Yes. Put these items into your blue cart

Bundled stretchy plastic bags and cling wrap

Bundle all stretchy plastic bags into a single plastic bag and tie closed before recycling. Acceptable bags include:

  • Grocery bags
  • Shopping bags
  • Sandwich/lunch bags
  • Resealable/Ziploc bags
  • Freezer bags
  • Bread bags
  • Dry cleaner bags
  • Plastic overwrap (wrapping on toilet or paper towel, water bottle cases)
  • Plastic film wrap (saran wrap)
  • Bubble wrap

Bag Tip: If the plastic bag/wrap stretches (like a grocery bag) it’s recyclable; if it does not stretch, is crinkly or tears (like a chip bag or cellophane), it’s not recyclable.

Paper and cardboard

  • Cardboard boxes (cereal, pizza, tissue boxes, etc.)
  • Toilet and paper towel tubes
  • Catalogues, magazines and telephone books
  • Newspapers, flyers and brochures
  • Letters and envelopes (remove plastic window)
  • Paper coffee cups and fountain pop cups (no lid)
  • Greeting cards
  • Non-foil paper gift wrap
  • Paper bags
  • Soup and beverage cartons (e.g.Tetra Pak® packages)
  • Milk cartons and juice boxes
  • Shredded paper (in a see-through bag and tied closed)
  • Paperback and hardcover books (separate hardcovers from pages)

Plastic containers with recycling symbol 1-7

Your blue cart is for plastic containers – if your plastic item is not a container, do not recycle.


  • Milk jugs
  • Yogurt tubs
  • Pop bottles
  • Takeout containers
  • Laundry detergent container
  • Body lotion containers (no tubes)
  • Beverage and juice bottles
  • Mouthwash bottles
  • Shampoo and conditioner bottles (no hand pumps)
  • Molded plastic packaging
  • A plastic holder with a cardboard backing – separate each item for recycling
  • Clamshell packaging
  • Divided food trays like cookie trays or party trays

Tin food cans and tin foil

  • Tin food cans
  • Clean tin foil (crumple up)
  • Foil take out containers and pie plates
  • Tin containers (e.g. cookie tins)
  • Pop cans

Glass food containers

  • Clean glass jars and bottles

Lids and caps – separate from container

  • Metal lids must be larger than 5 cm (two inches) in diameter
  • Plastic lids must be larger than 7.5 cm (three inches) in diameter

Lids tip: if the lid is about the size of the palm of your hand, it’s ok to recycle. Please note that all coffee cup lids belong in the garbage. The are too light to be sorted properly at the recycling facility.